Auto Shutdown Functionality in Easy ShutDown Windows Utility
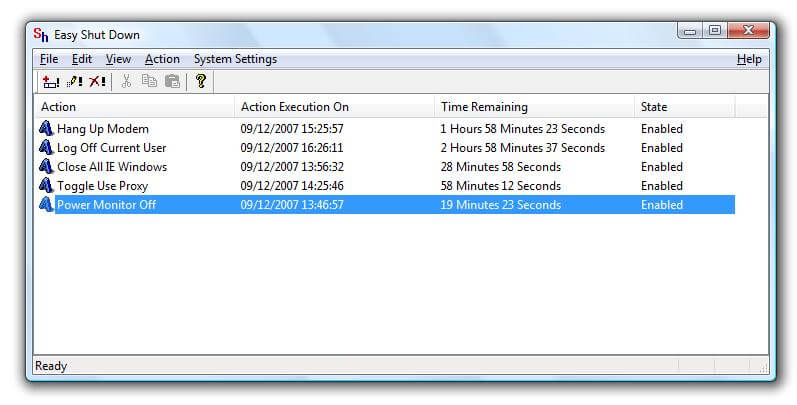
Main Screen of Easy ShutDown Windows Utility

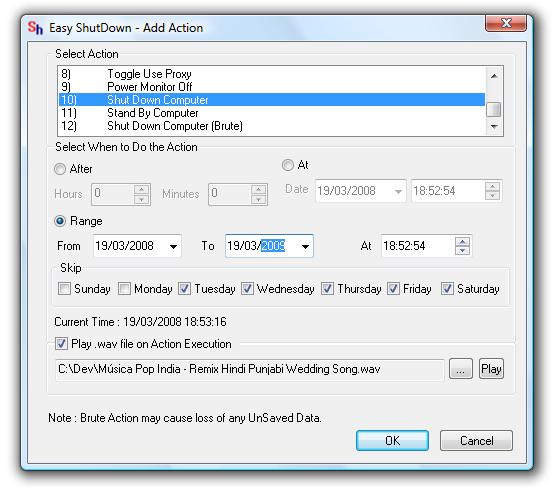
Easy ShutDown Add Action
- Launch Add Action Dialog Box from the Easy Shutdown Windows Utility Menu by selecting File - > Create New Scheduled Action.
- Now Select Shut Down Computer from the list titled Select Action.
- Now you can opt to Auto Shutdown Computer after x hours and y minutes.
- Or you can opt to Auto Shutdown Computer at specified Date and Time.
- Or you can opt to Auto Shutdown Computer by defining a Range and optionally skip few week days.
- Select the appropriate Radio Button and then define the appropriate value.
- Click on OK.
- That's it. The Action(s) will be added to the action execution list.
- Main Screen of Easy Shutdown Utility will display the progress of the added action(s).
- You can minimize the application or click on close button of Easy Shutdown Utility.
- In case you wish to abort auto shutdown initiated, you can close the application by selecting File - > Exit or Right Click on the System Tray Icon of Easy Shutdown and select Exit.
- In case you feel that some feature would have been some other way so that it could be more useful for you, then please do drop an email to support@easyshutdown.com.

Register Easy Shutdown Utility from the Software's Main Menu with Credit Card/ Debit Card or PayPal Account for only $8.76.
Navigate to the Homw Page of Easy Shutdown
Schedule Shutdown to shutdown computer according to defined schedule.

